

By Luigi Fragale
Overview
Electromagnetic fault injection (EMFI) depends on placing a probe over exactly the right spot on a chip, again and again. Luigi Fragale shares how he and fellow Anvil engineers turned an inexpensive 3D printer into a scriptable positioning rig for the PicoEMP. The team is also releasing the 3D-printable mount so others can build their own.
Read Luigi's walkthrough of the build below.
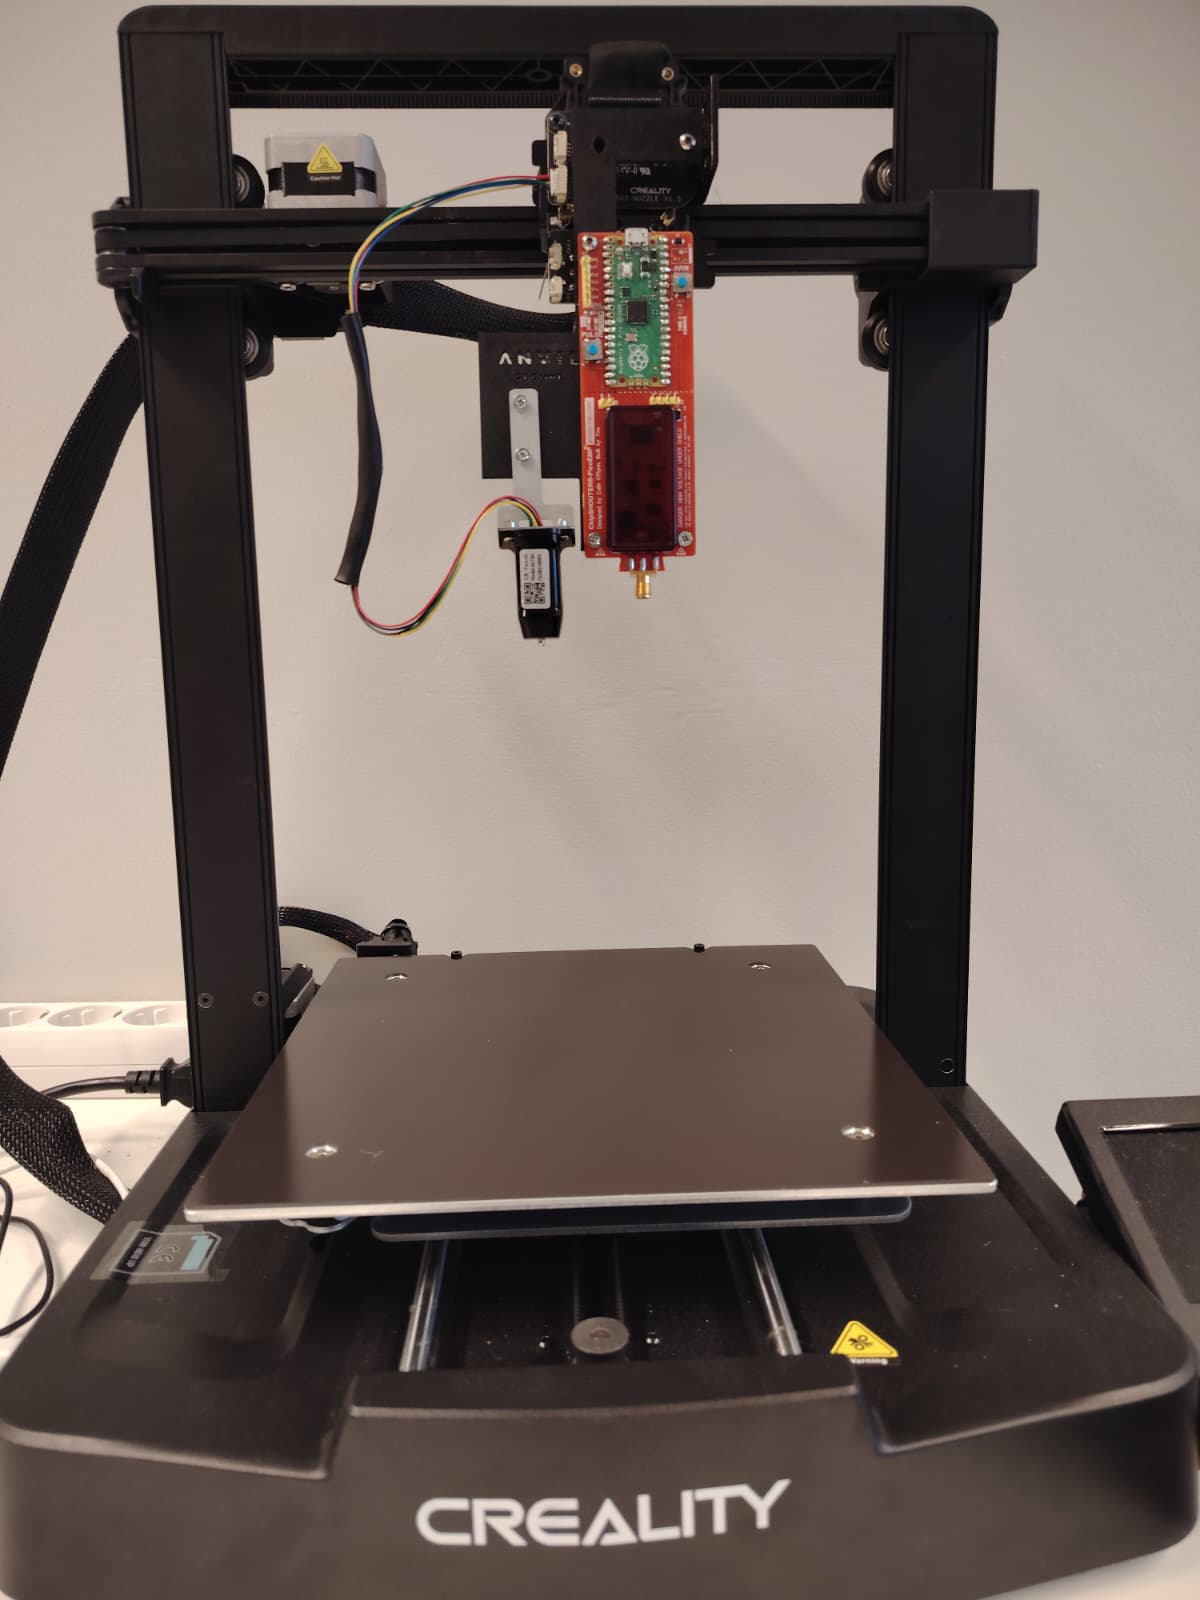
Electromagnetic fault injection (EMFI) is only as good as your ability to put the probe exactly where you want it, over and over again, and with the right power. In this post we walk through the rig we built to do that on a budget: a PicoEMP fault-injection probe mounted on a Creality Ender-3 V3 SE, turned into a scriptable XYZ positioning stage with a small custom 3D-printed bracket. We cover why we picked these specific components, how the mount is designed, and how we drive the whole thing from Python.
Why positioning matters
The electromagnetic field a fault-injection probe produces is tightly localized, so finding the spot on a chip package that actually induces a useful fault usually means sweeping the probe across the die in a fine grid, often in steps well under a millimeter, while repeating the same pulse timing at each position. Doing that by hand with a manual XY table is slow and inconsistent. Doing it with a motorized, scriptable stage is not only faster, it's also repeatable enough to log exactly which coordinates were tried, which makes the whole process reproducible.
That's the actual requirement: precise, repeatable, motorized XYZ motion, controllable from a script. So why not using a 3D Printer and open source tools available ?
Picking the components
- NewAE PicoEMP: A compact, low-cost EMFI pulse source. Its serial command interface supports operations such as arming, disarming, pulsing, and selecting external high-voltage control. Physical ARM and PULSE buttons also allow manual operation.
- Creality Ender-3 V3 SE: An inexpensive, widely available FDM printer. Standard G-code over USB serial provides motion control. Its print-head carriage also carries a CR-Touch bed-leveling probe, providing a useful mounting reference.
- A custom mount printed on the same printer: The bracket secures the PicoEMP assembly to the print-head carriage.
Designing and printing the mount
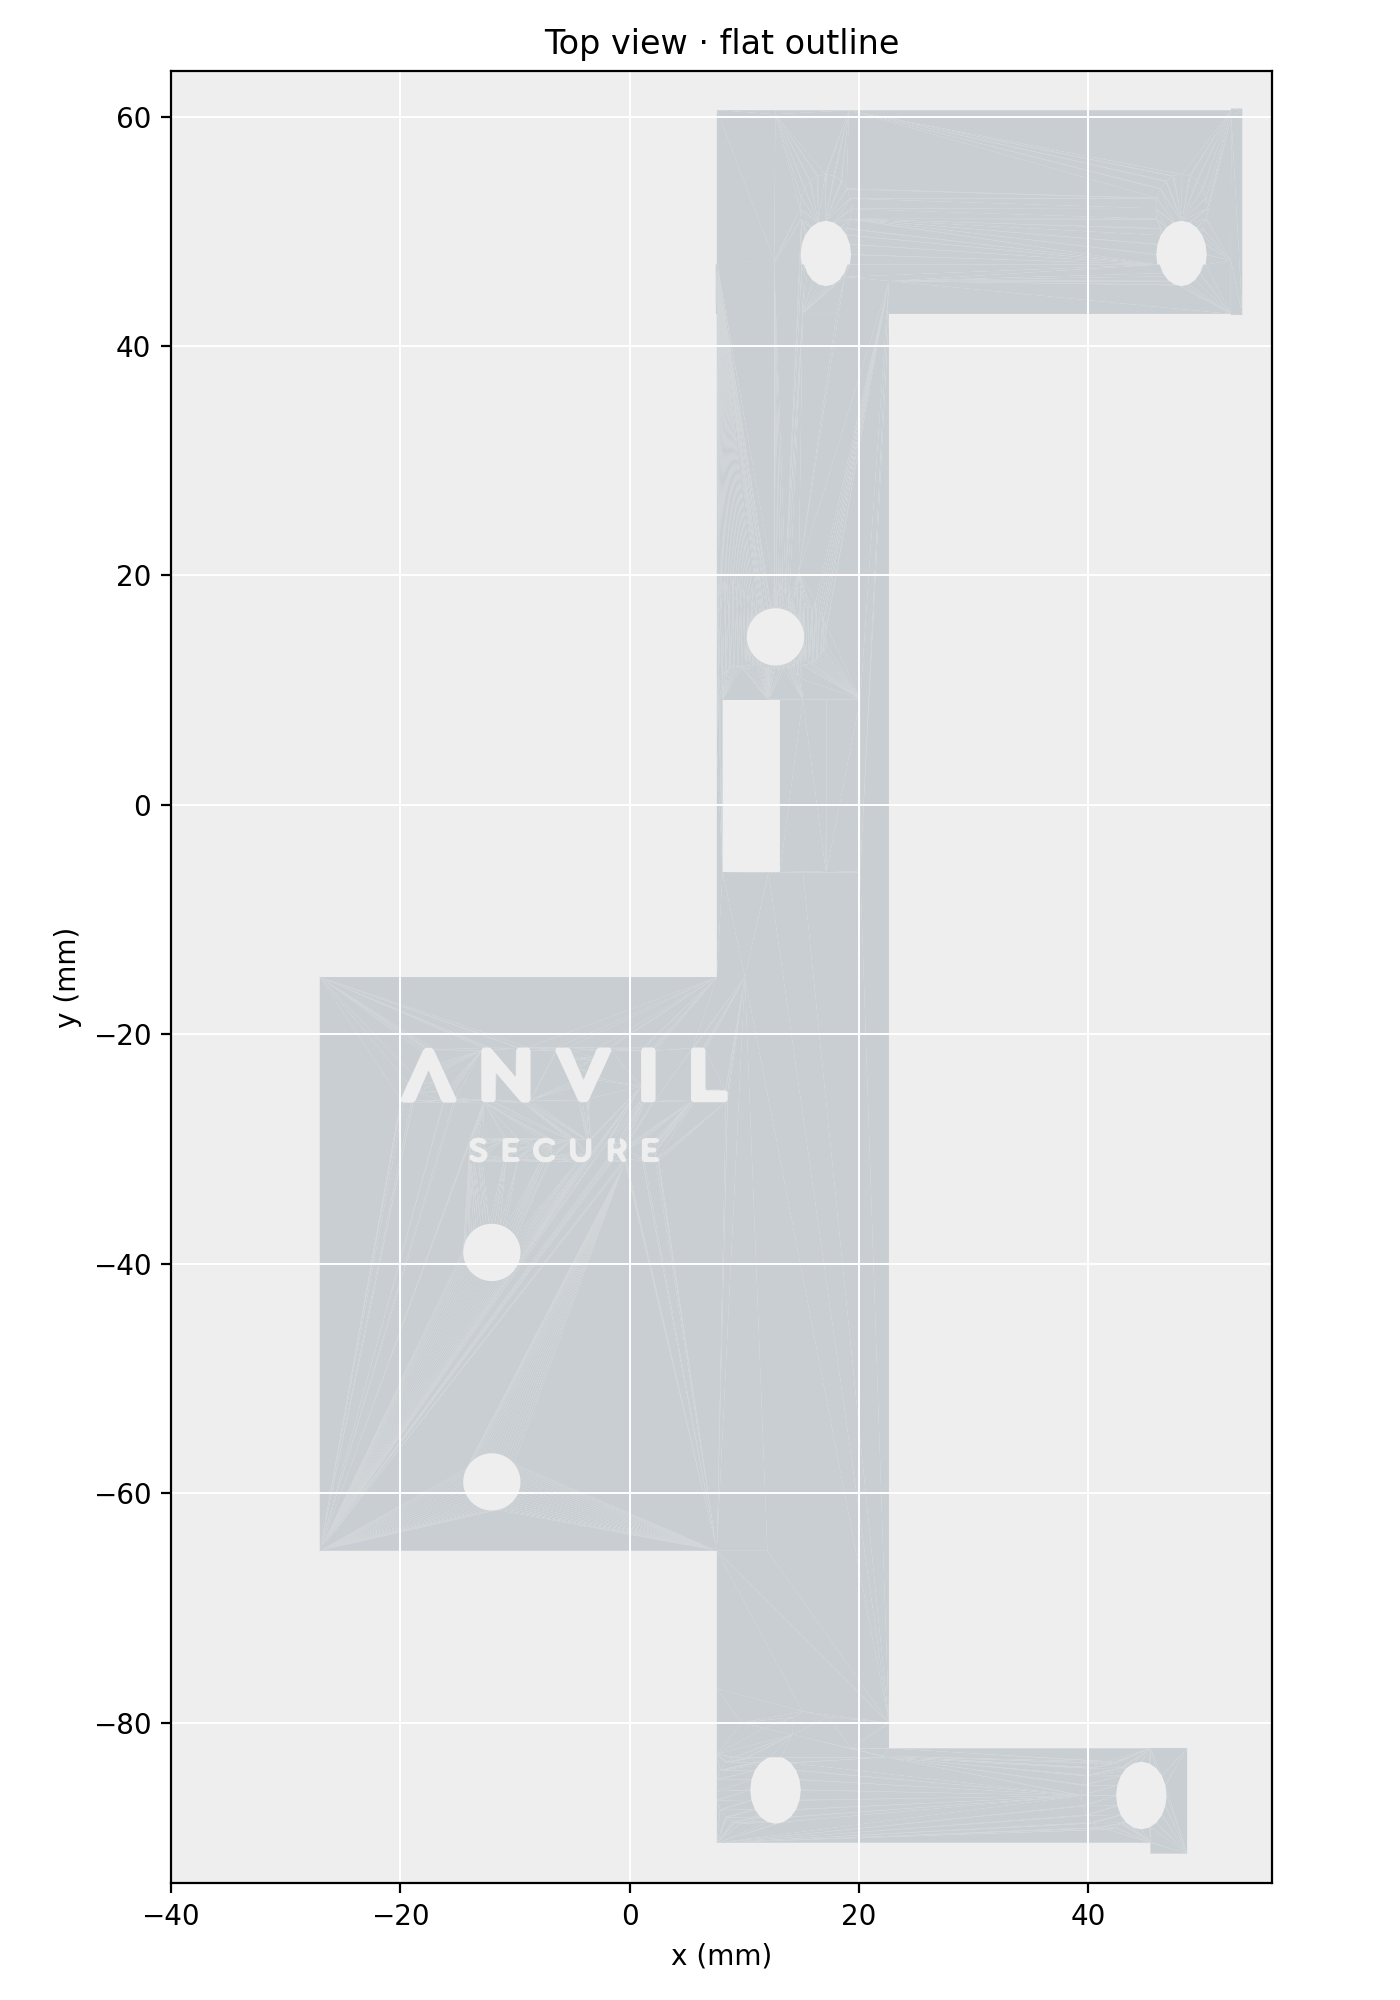
The final mount, CE3V3SE_picoemp-mount-extension-anvil.stl (available on GitHub), is a flat, dog-leg-shaped plate approximately 80.4 × 152.1 mm. The main plate is 3 mm thick. It has seven through-holes distributed across the upper flange, vertical stem, offset mounting plate, and lower flange. A rectangular opening below the stem hole provides clearance for nearby hardware. The top-view render shows the outline, holes, and opening:
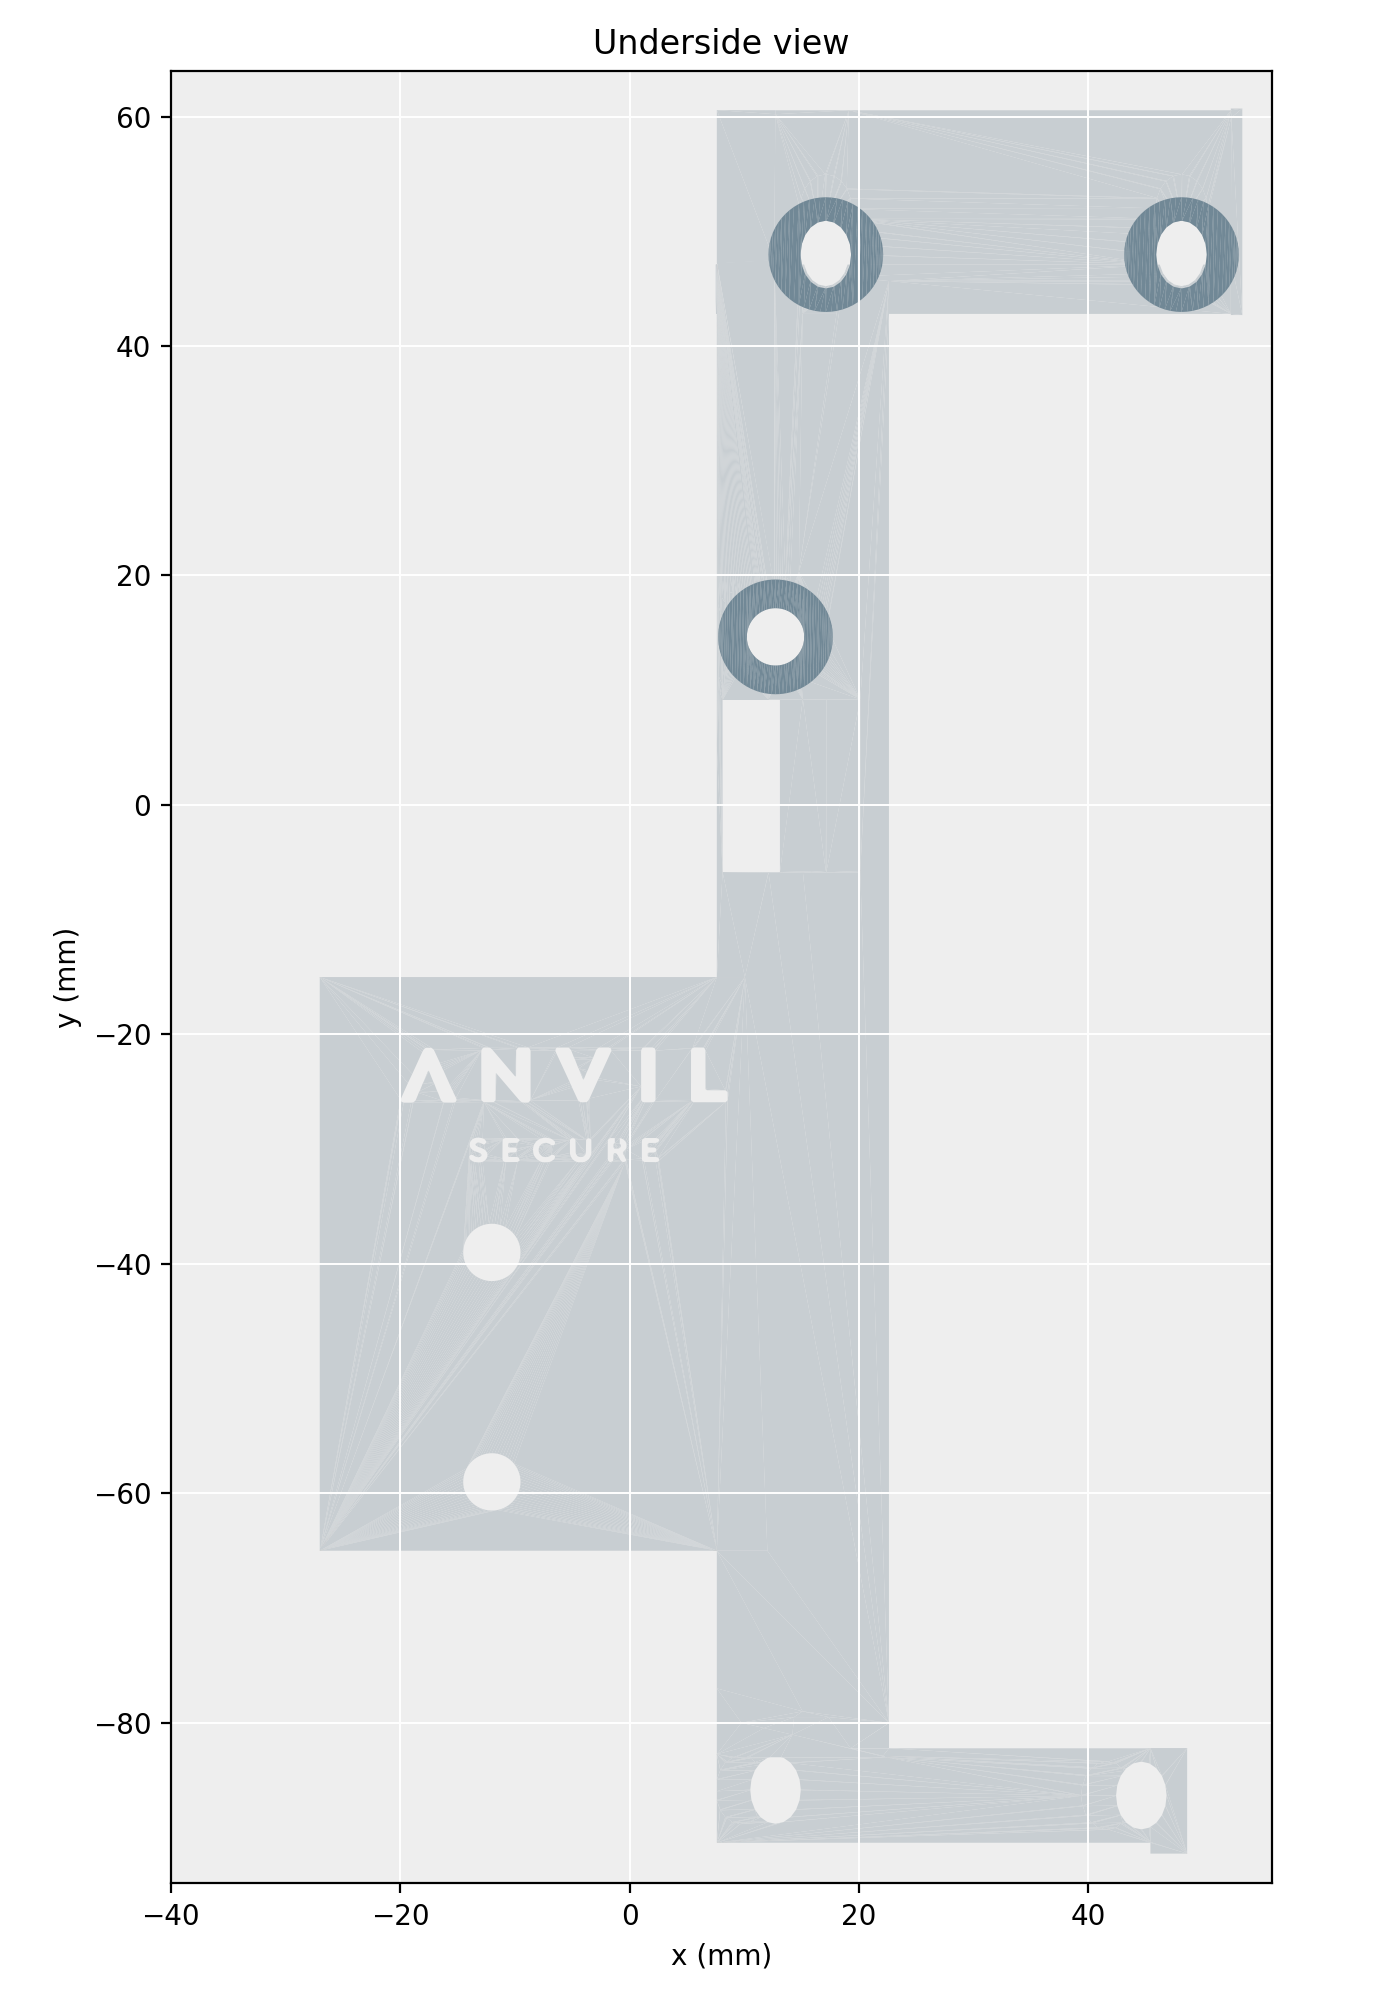
Three holes have 10 mm-long bosses on the underside: the two holes on the upper flange and the aligned hole on the vertical stem. These bosses act as standoffs, keeping the mount stable around connectors and other protruding hardware on the E3V3-Nozzle board. The underside render shows all three bosses:
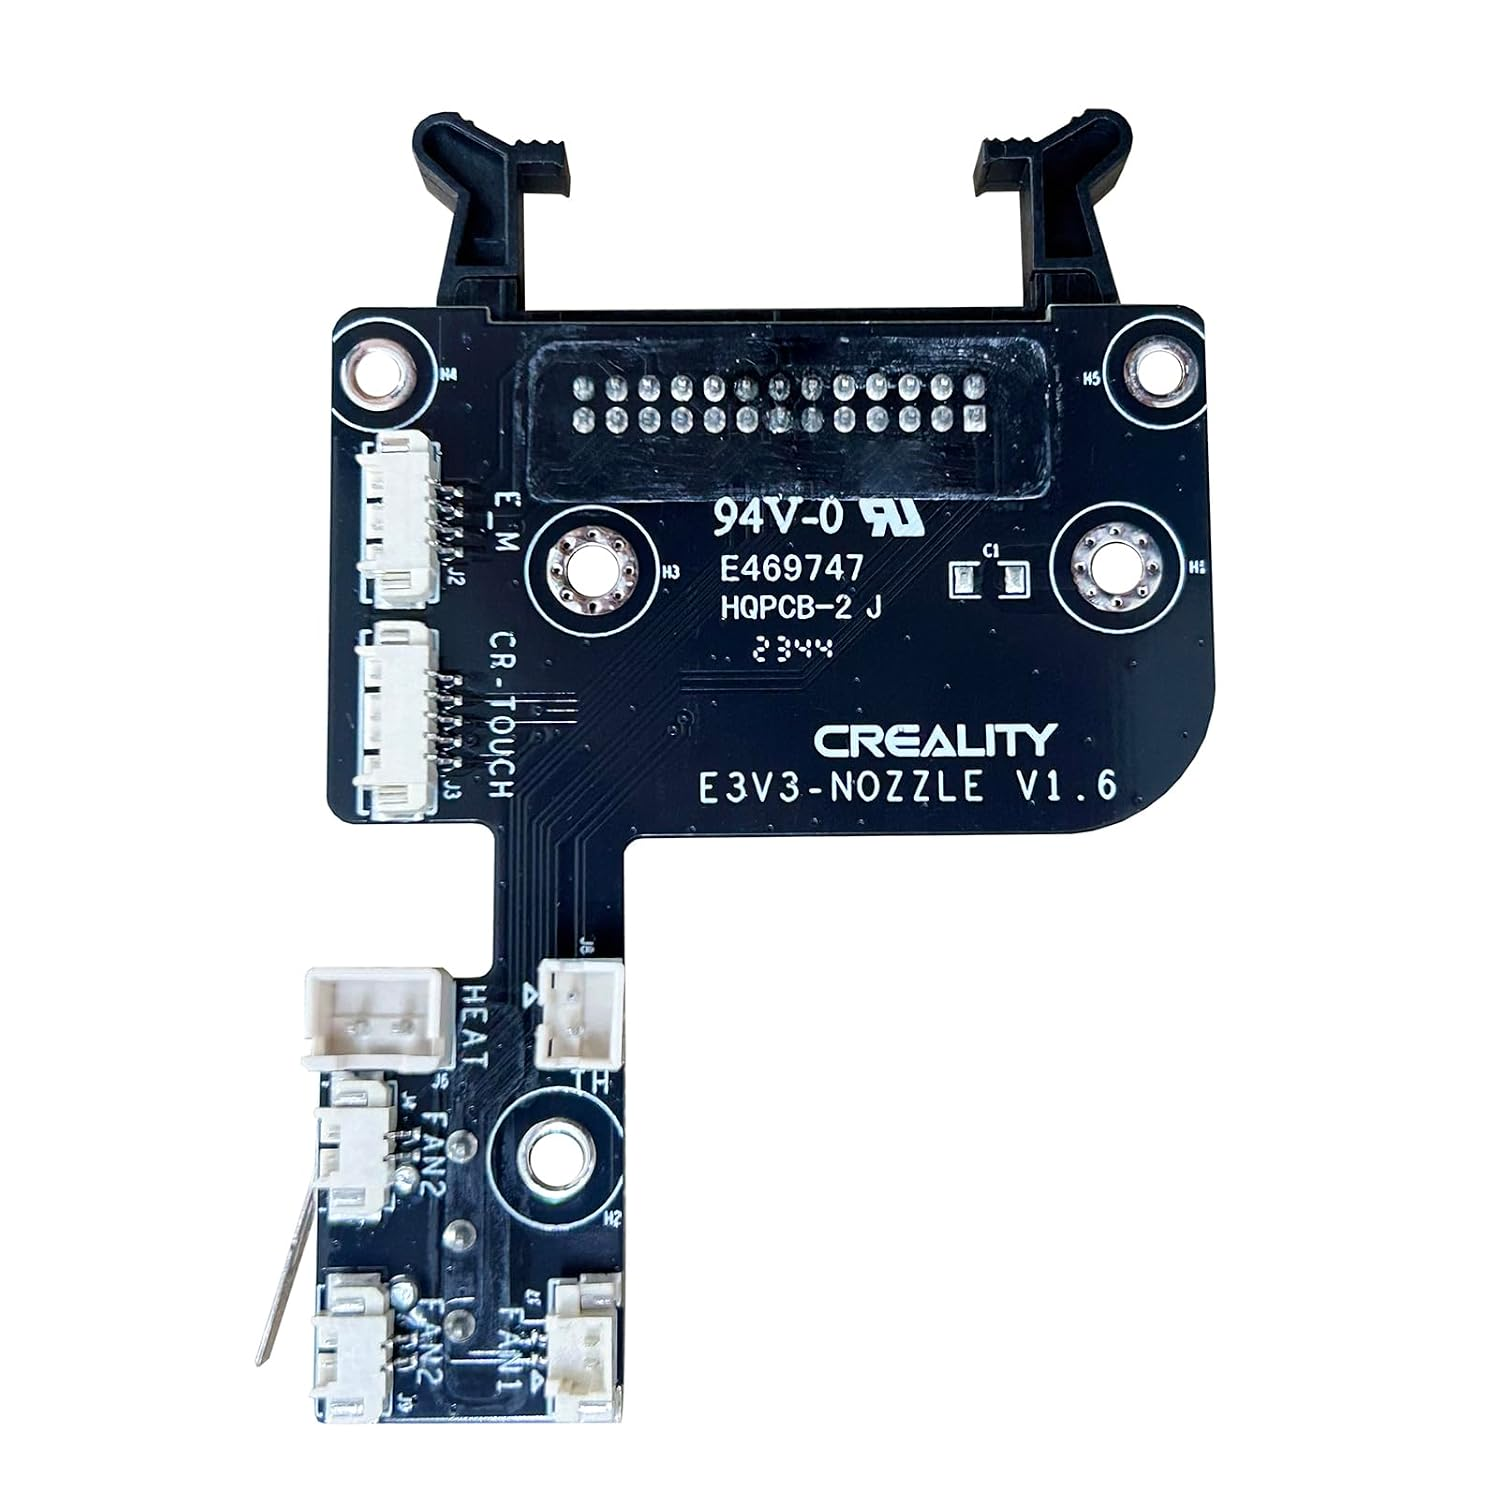
The mount attaches to the stock Creality E3V3-Nozzle print-head assembly. The board image below provides a reference for its mounting-hole layout:
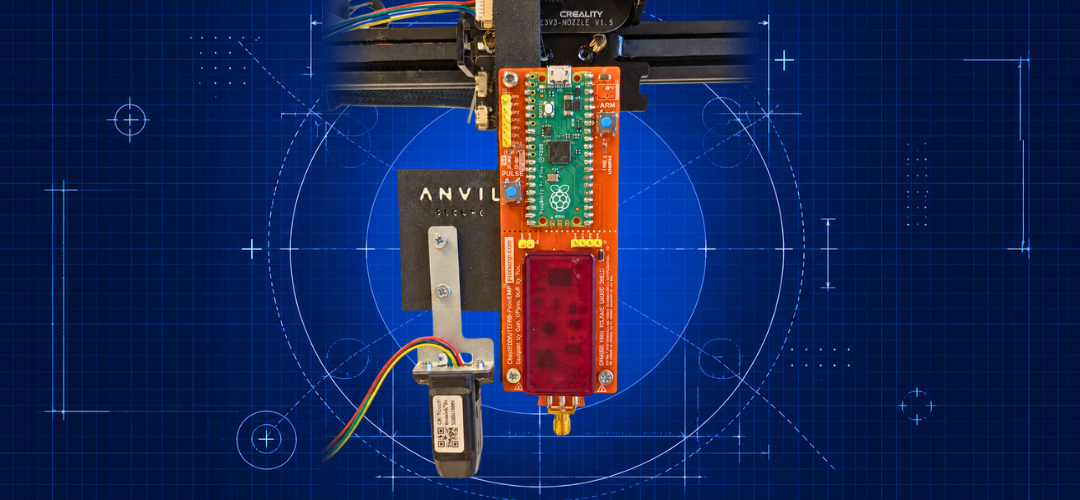
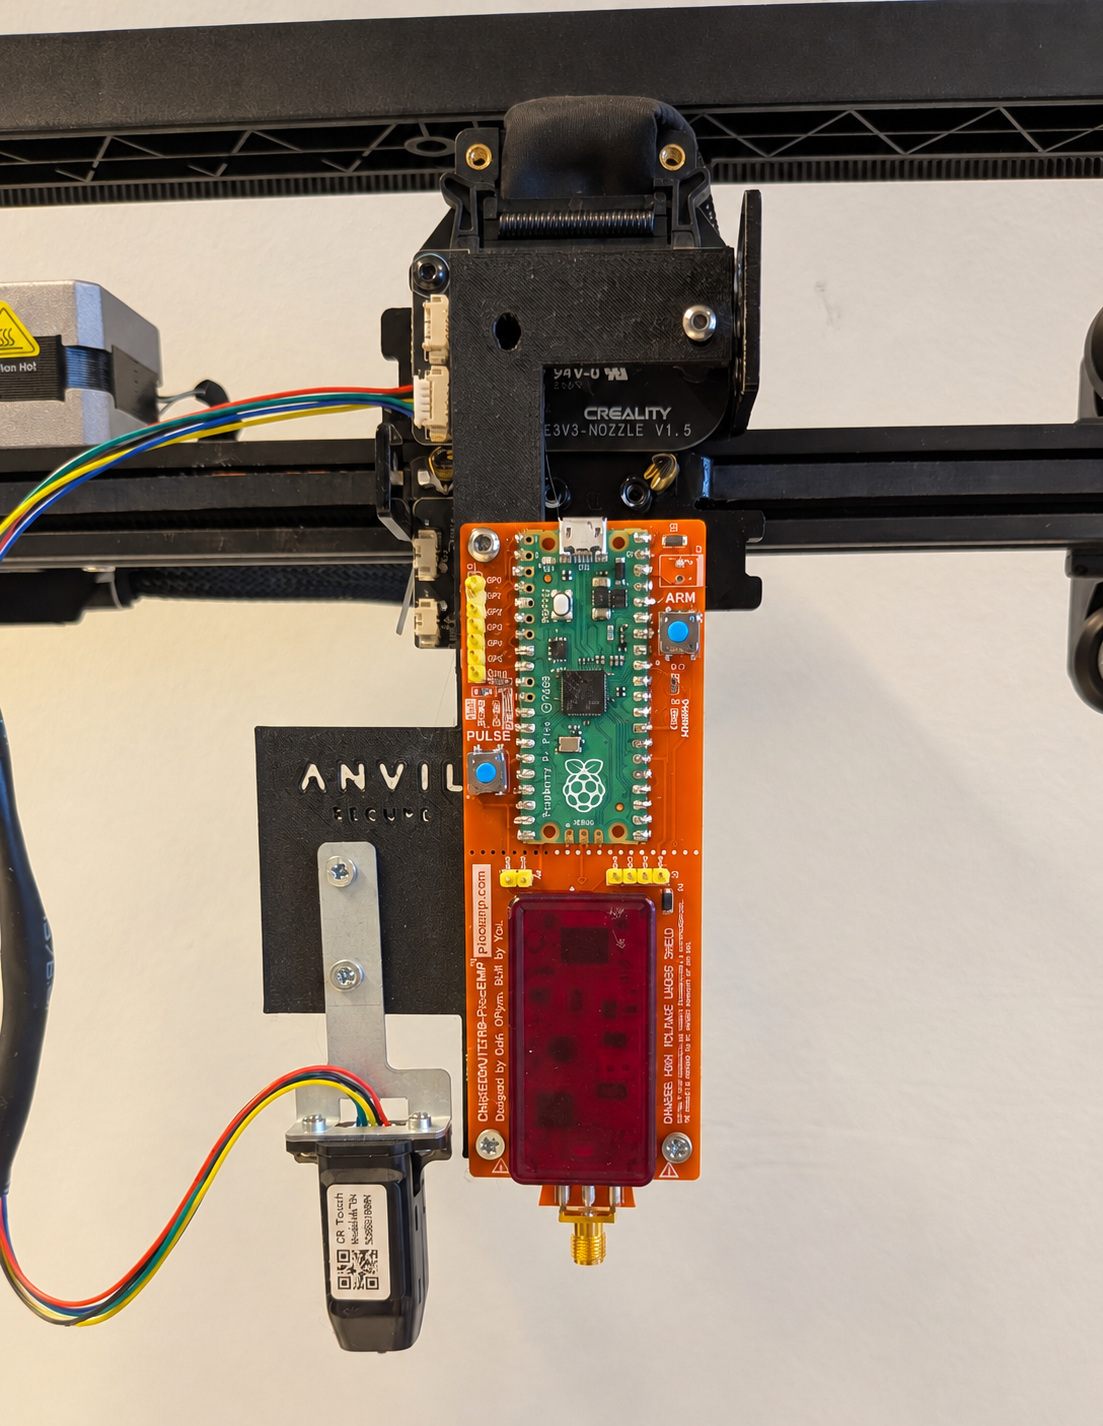
The mount in turn holds a small metal L-bracket that carries the PicoEMP board vertically, SMA output facing down toward the bed. Here's what it looks like fully assembled, with the PicoEMP board bolted on next to the stock CR-Touch probe:
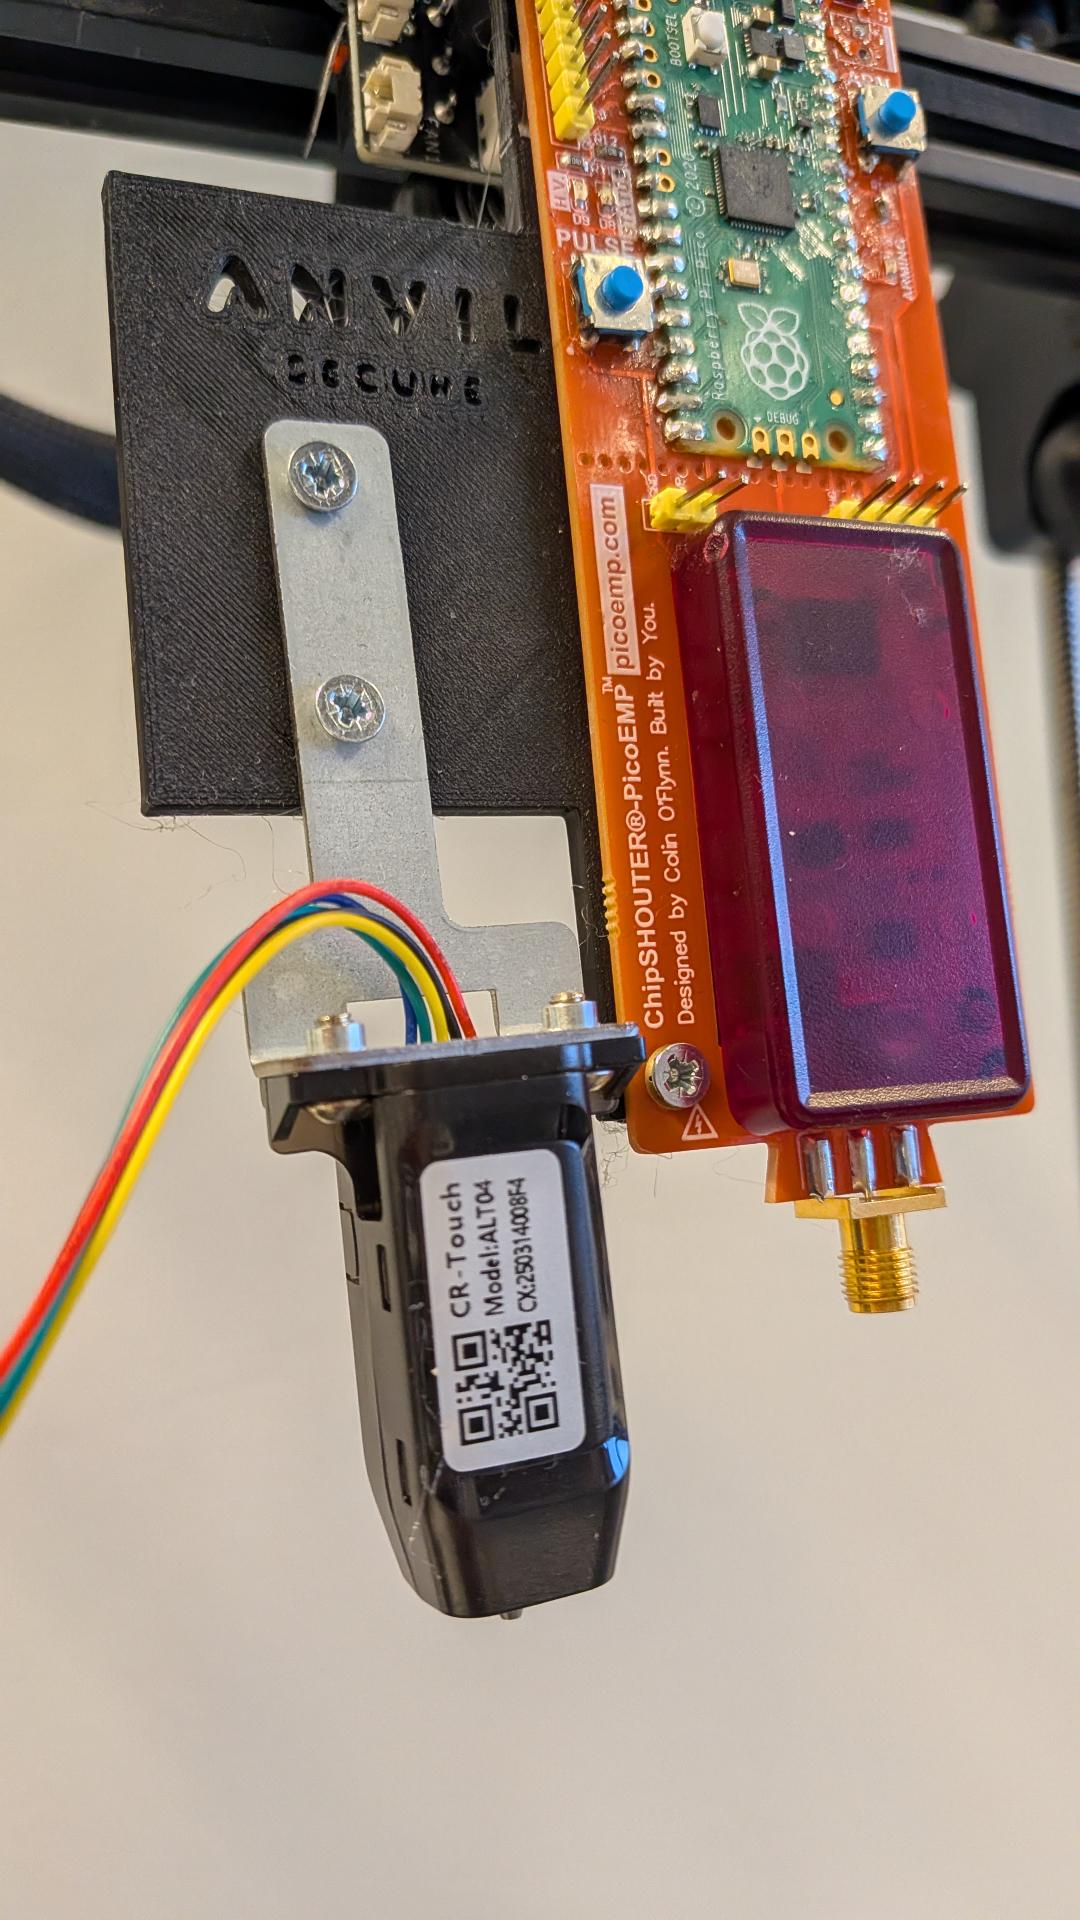
We printed the part in standard PLA on the Ender-3 V3 SE. The application requires dimensional stability at room temperature and carries only a light static load.
The importance of a target holder
The probe is only half of the setup. As highlighted earlier, repeatable experiments depend on keeping the target in exactly the same position every time. If you lift the target board off the bed to reflash it, swap in another board, or reconnect its UART, you lose that reference. If you place it back by eye, the coordinates from your last sweep no longer point at the same spot on the chip.
A printed target holder solves this. The build plate already has two screws, and the holder uses them as alignment points, so it returns to the same position every time. The printer itself needs no modification. Once you've calibrated the origin with the holder in place, every later sweep can reuse the same coordinates.
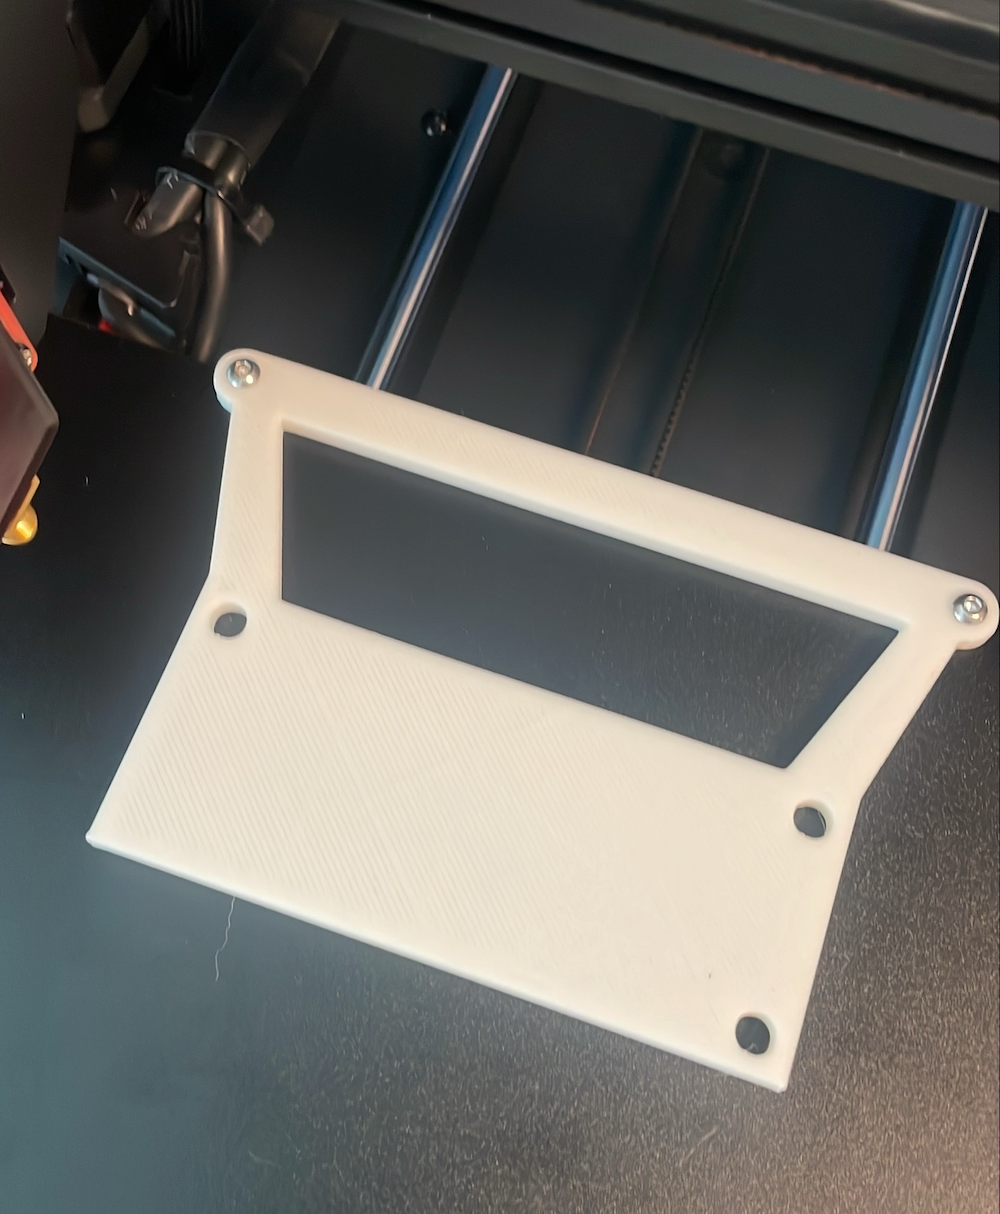
The holder in the photo is one example, made for one of our targets. Each board has its own footprint, so you design the holder for the board you're using. The holder is printed on the same Ender-3 V3 SE.
Driving it in software
Both halves of the rig are controlled from small Python wrappers over serial. The printer wrapper turns coordinates into G-code:
class GCodePrinter:
    def __init__(self, port='/dev/ttyUSB0', baudrate=115200, timeout=2):
        ...

    def move(self, x=None, y=None, z=None, f=1500):
        gcode = "G1"
        if x is not None:
            gcode += f" X{x}"
        if y is not None:
            gcode += f" Y{y}"
        if z is not None:
            gcode += f" Z{z}"
        gcode += f" F{f}"
        self.send_gcode(gcode)

    def home(self):
        confirm = input("Is the coil tip removed? Do not home the device with it attached (y/n): ").strip().lower()
        if confirm == 'y':
            self.send_gcode("G28")
And the PicoEMP wrapper turns its serial CLI into ordinary method calls:
class PicoEMPController:
    def arm(self): self.send_command('a'); time.sleep(1)
    def disarm(self): self.send_command('d'); time.sleep(1)
    def pulse(self): self.send_command('p'); time.sleep(1)
    def external_hvp(self): return self.send_command('ex')
    def setup_external_control(self):
        self.disable_timeout()
        self.external_hvp()
        self.status()
With both wrappers connected, moving the probe to a coordinate and firing a pulse is just:
printer.move(x=10, y=20, z=5)
pico.arm()
pico.pulse()
That is the core interface. Grid spacing, target checks, and result classification can be built on top of these two operations.
Open-sourcing the mount
At Anvil, we like to turn one-off shop tooling into something the wider community can pick up and reuse. In that spirit, we're releasing the STL files and their preview renders, so anyone with an Ender-3 V3 SE and a PicoEMP can start experimenting with this technique on a budget.
Resources
Conclusion
This is a deliberately low-budget approach, and it comes with real, quantifiable trade-offs: the Ender-3 V3 SE's stock firmware steps its X/Y axes at 80 steps per millimeter, a ~12.5 µm step size on paper, but belt tension, pulley backlash, and frame flex mean real-world positioning error (tens of microns, versus Creality's own ±0.1 mm rating) and it is clearly way less precise than lab-grade equipment like Riscure's.
Even so, similar PicoEMP-on-printer setups have proved useful in public research. Glitching in 3D: Low Cost EMFI Attacks demonstrates targeted EMFI against an STM32F4, while Decoding EM-FI Attacks: Lessons Learned from Glitching the GigaDevice GD32F407 discusses bypassing read-out protection on a GD32F407.
The rig costs far less than a dedicated fault-injection positioning table, and the mount can be modified and reprinted quickly as the setup evolves.
Related Links
More from Luigi